In my journey of moving from Linux to OSX, I’m always trying to find the tools that I’m used to work, because that’s the way I’m more productive, and one of the most important tools is a good terminal, on linux I used a combination of guake and terminator, the first one to run commands that I need the output immediately the latter to do actual programming stuff, that is because guake can be called from a hotkey and shows a small terminal coming from the top like quake used to do it, this is a fantastic way to run simple commands because the terminal is always open, we just show/hide and only uses a part of the screen, also when it is called is always ready to be used for example if I need to do a quick grep on a project I would do F12 (this is my hotkey) then type grep ‘pattern’ ~/Project/project123 -R then just hide the terminal and continue my work.
When I moved into OS X I searched for a good terminal replacement, one that supported 256 colors with good emulation, and also with the ability to split panes like terminator, and I found iTerm2 a wonderful terminal application that has everything, after setting my profile to work with my vim color scheme, and putting all my stuff from .bashrc I wanted to have a guake like terminal to run commands quickly, and I found the hotkey function so this is how I set it up to work like guake.
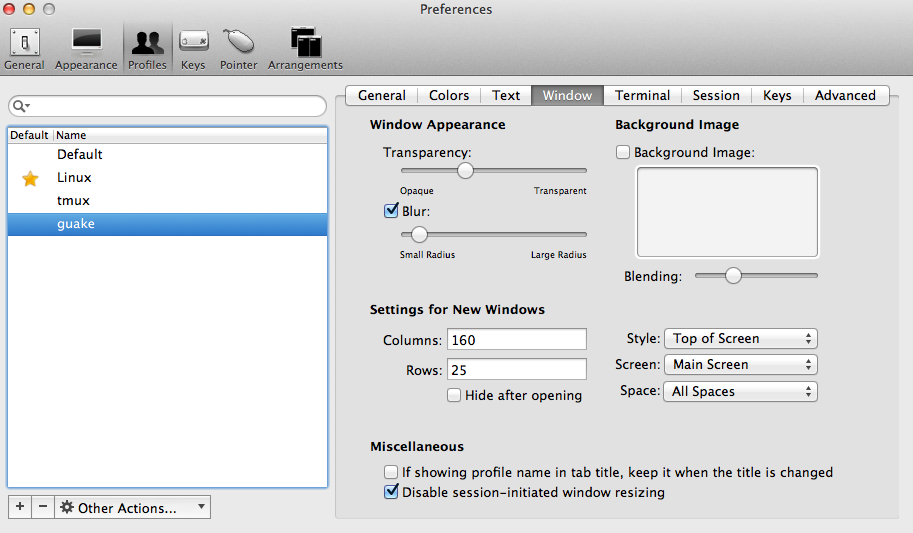
First thing is to create a new Profile or duplicate the one that you use the most, then on the Window Tab I set the style as Top of Screen on Main Screen (I have 2 monitors) and on all Spaces. I set 160 columns by 25 Rows.
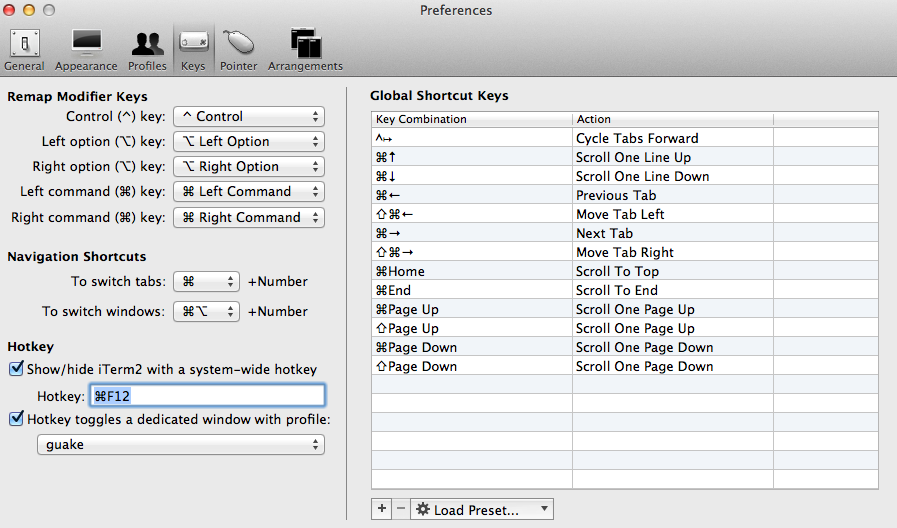
After I have my profile done, I clicked on the Keys Icon then activated the “Show/hide iTerm2 with a system-wide hotkey” I’m unable to use F12 because that moves me to the dashboard so used ⌘F12 then selected the profile I’ve created and done
here is a small demonstration of how it works after the setup